The Site Map is where you can manage your Sites and plot out your Site block and / or locations. From here you can add, edit and delete Sites.
The toolbar gives quick and easy actions you can perform when in the Site Map function. The tools are located at the top right of the screen and perform the following functions (from left to right):
- Creates a Site - Opens Site registration form
- Focus all Sites - Zooms map out so that all Sites are in view
- Focus current location - Takes map to current location (e.g. apply to orientate Users)
- Refresh page - refreshes the Site Map and reloads Site data
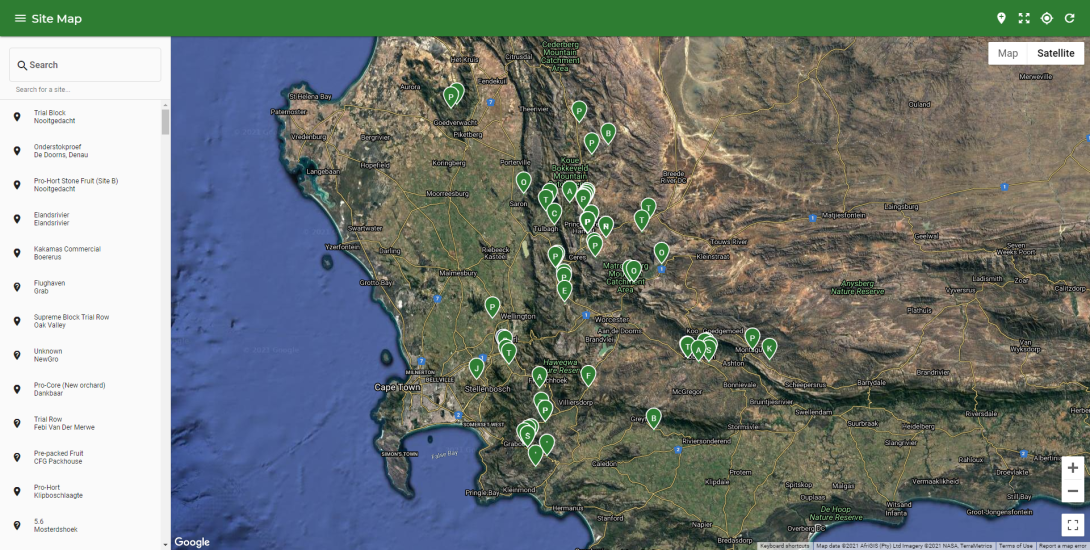
The Site Map with a list of Sites within an Organisation
On the left side of the Site Map you will see the list of your registered Sites within your Organisation. At the top of the list is a Search bar where you can find the Site you are looking for. Click on a Site to see more information.
To add a Site:
- Click on the Create Site button, at the top right of your screen, to open the Site registration form
- In the Add Site Dialog, enter the details of your Site

The Add Site Form Form
Description of each field:
Basic info
- Location / Farm / Production Unit: The name of the farm / Site or simply a common name used to refer to the Site
- Block / Orchard Name: The name or number of the trial block / orchard contained within the Site, usually a block number will apply
- Row Spacing: A commonly used distance between the Rows within the block (in millimeters)
- Column / Plant Spacing: A commonly used distance between trees within the block (in millimeters)
- Important to include Row and Column / Plant spacing for calculations of Yield estimates in the Report function
The Geolocation section describes the absolute position of the site. You do not have to manually enter these values, as they will be added in a later step
- Latitude: Geographical latitude coordinate of the Site's center point in degrees North (Negative value indicates South)
- Longitude: Geographical longitude coordinates of the Site's center point in degrees East (Negative value indicates West)
- Area: The surface or piece of land (in square meters)
- Altitude: Altitude of block in meters above sea level (in meters)
Address
- Street Address: Street address of the Site
- City: In which city it is located or closest to
- Region: An area, e.g. a specific part of a country
- Postal Code: Postal code of the city
- Country: Country in which the Site is located
Once you have entered all the required fields, select the Save button to register the Site.
After the Site has been registered, you will be able to select the Site on the left from a list of Sites. This will display a small info card of the Site and move the map to the center on your Site.
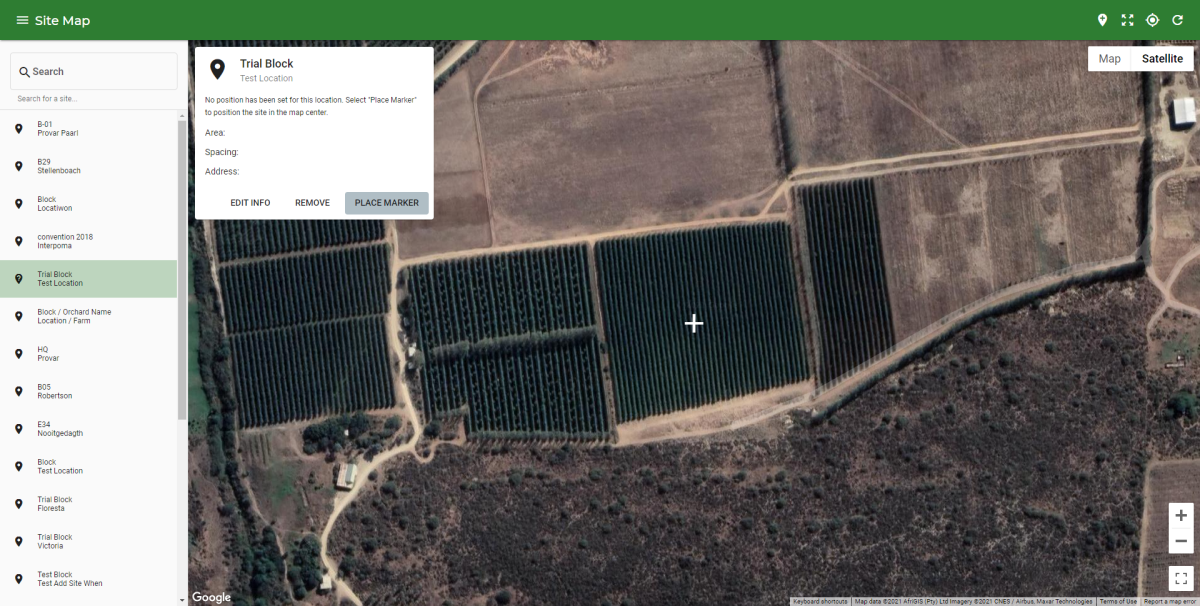
The detail card of a Site
The following are actions you can perform on the Site detail window:
- Edit the info of the Site
- Remove the Site from you Organisation
- Place/Edit the Marker of the Site (Based on it the Site has a Geolocation or not)
If you have not entered coordinates for the Site, you will notice that the Site has a question mark in the Site icon. This means that the Site is not yet bound to a specific geolocation. However, it is not required to bound the Site to a location. You can still manually fill in coordinates to set the geolocation of the Site, but you can quickly use the Site Map to find your Site on the Map and place your marker.
You will notice a small white cross in the middle of the screen when you have a Site selected that does not have a geolocation. You can use this position to place your marker on the preferred location. Once you are satisfied with the location you can click the PLACE MARKER button.
After you have placed your marker, a four point boundary will appear over the area along with a Marker on the Map.
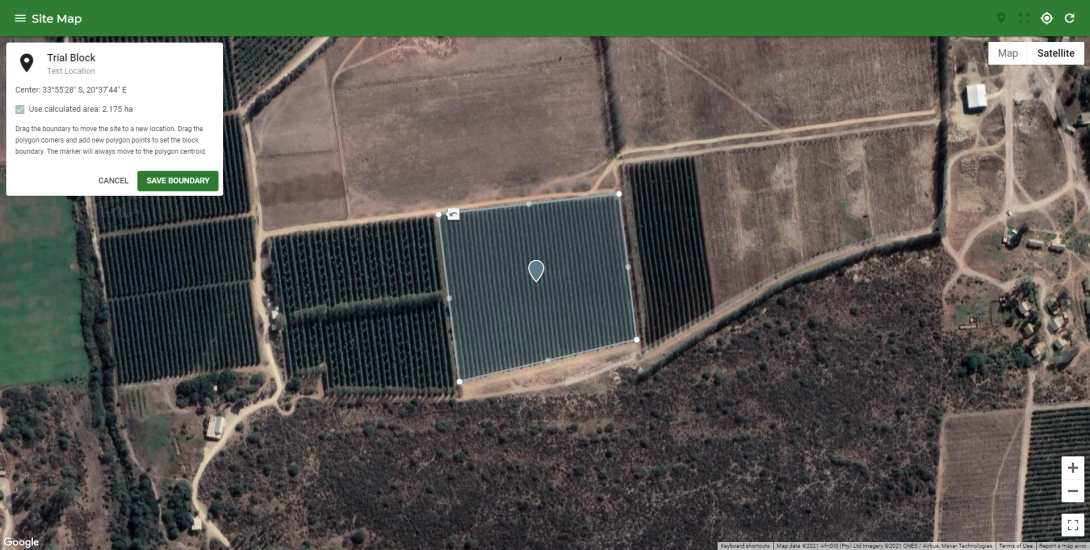
The boundary outlining your block
You can now drag the marker across the block where you wish to mark out the Site. Notice as you move the boundary, the marker shifts to the centroid of the polygon as well as the area being indicated on the Site detail card. Once you are satisfied with the layout, you can click the Save Boundary Button You have successfully registered and laid out the boundary for your Site.